1) Turn on only one WiFi Tally that you want to configure to the power source (USB adapter, power bank ...). The blue LED is the first to light up to indicate that the device is switched on, and after a while the main LED will also turn orange.
INFO: In case you are changing the settings on an already configured WiFi Tally, you need to turn off the router so that the WiFi Tally does not log into your WiFi network!
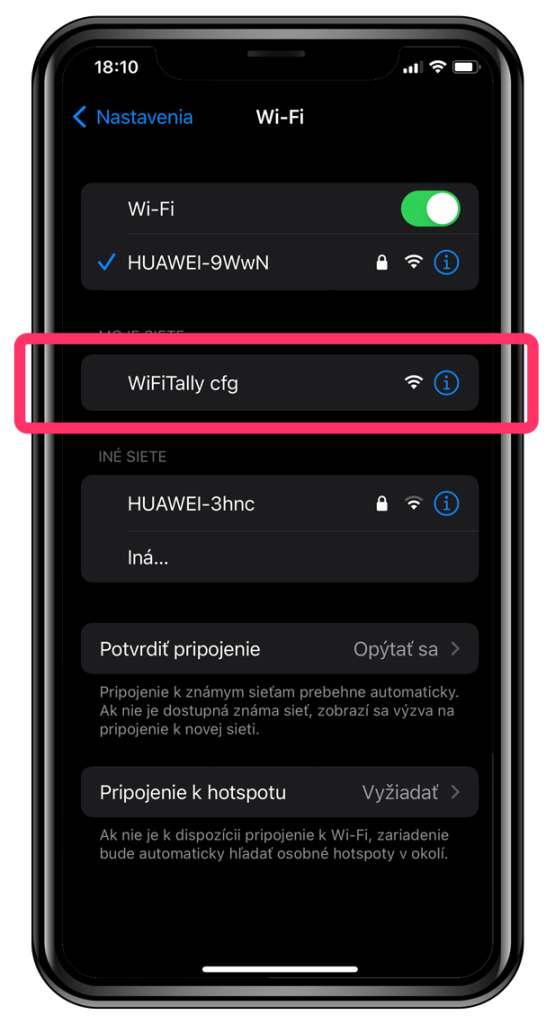
2) On the device you want to configure WiFi Tally with (smartphone, tablet, computer) select the WiFi network that WiFiTally cfg and connect.
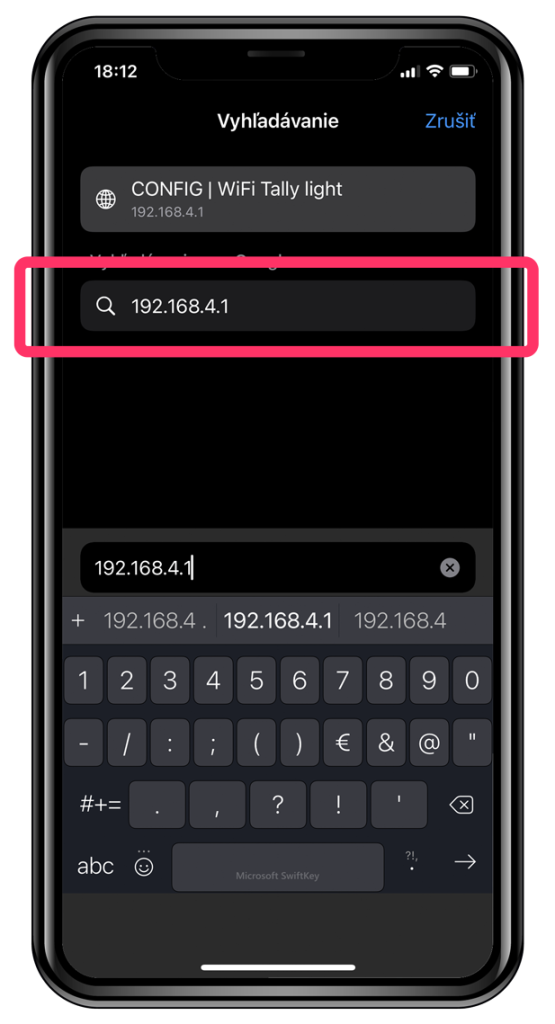
3) Run a web browser on the device to configure WiFi Tally via the custom web interface Safari, Google Chrome, Opera ....
4) Enter the IP address 192.168.4.1in the browser address, which will launch the web interface for the actual configuration of the connected WiFi Tally.
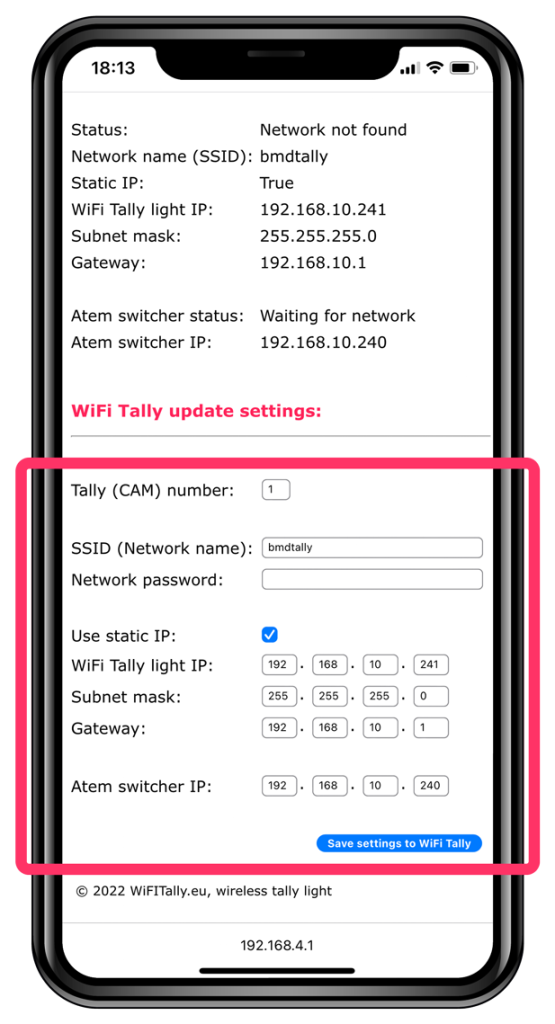
5) In the WiFi Tally configuration interface, the current configuration is displayed at the top
6) At the bottom of the WiFi Tally web interface there is a configuration/update form
• Tally (CAM) number - number of the camera at which the configured WiFi Tally should light up
• SSID (Network name) - enter your SSID (WiFi network name) to which the WiFi Tally should log in
• Network password - enter the password to your WiFi network
• Use static IP - check to confirm the use of a static IP address
• WiFi Tally light IP - enter the IP address that the router should assign to the configured WiFi Tally
• Subnet mask - enter the subnet mask
• Gateway - enter the gateway IP address
• Atem switcher IP - enter the IP address which is set in Atem directed by
7) After filling in the configuration data, click Save settings to WiFi Tally